Because of some changes in my company I now have to code for iOS. This is why I need to learn Cocoa (the programming language for developing iOS software). So tonight I have set up a virtual machine with Mac OS X Lion 10.7.2 to play a little bit around with Xcode - the preferred IDE.
Till now I thought setting up a Mac-VM is very difficult and hard to obtain but it was very easy and I hadn´t any problems. To help all you guys out there that like to do the same, here is my how to ;-)
For this how to I assume that you have already played around with VMware and also know how to open a terminal window in Mac OS X.
2. Getting the software
- For the virtualization I have used a VMware Workstation 7.0.0, can´t say if there are problems if you use the Fusion or the Player, if you like to test it I would appreciate a comment about your experience ;-)
- The next thing you need ist the “Mac OS X Lion Bootable .vmdk (For VMware)”, google it, download it - should around 4, 12GB
- VMware unlocker mirror1, mirror2 (contains unlocker for VMware Fusion, Player & Workstation - Linux only for Workstation)
- VMware guest installation
- Audio driver
- Mac Os X update to 10.7.2 from Apple
3. Prepare
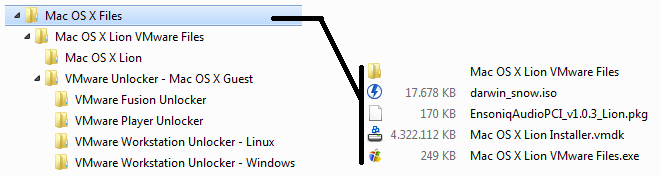
- Execute the VMware unlocker (Mac OS X Lion VMware Files.exe), it extracts the unlocker and a predefined VM.
- Your directory should now look like this (Mac Os X update to 10.7.2 isn´t listed - sorry!):
- Now, if you have installed the Workstation run the windows.bat in the directory: VMware Workstation Unlocker - Windows. If you use Fusion, Player or Linux take the appropriate folder ;-)
- A little bit intel, what are you installing? This is in the windows.bat
 net stop vmauthdservice
"%~dpn0_32.exe" %*
net start vmauthdservice
The windows.bat stops the VMware service, installs a patch and then starts the service again. At this point you have to trust the patch that he does what you’re expecting and isn´t a virus..
- Now go to the Mac OS X Lion folder and double-click the Mac OS X Lion.vmx that should start the VMware - likewise you can start the VMware first and browse for the file.
- Now you see the VM in VMware:
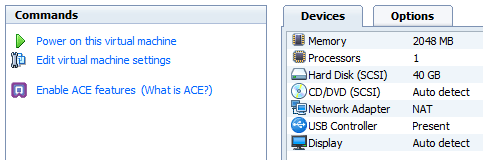
- Edit the VM settings and add another (existing) hard drive, the
Mac OS X Lion Installer.vmdkthat you have downloaded earlier - around 4,12GB, you remember? - Also edit the CD device and add the darwin_snow.iso
- Now it should look like this:

4. Installation
- Start the VM!
- Select “I moved it”
- If VMware asks you to repair the hard drive, let VMware do it.
- Now follow the Mac OS X instructions for installing the OS.
- When you´r done and reached the Mac desktop open the CD drive of your VM and install the VMware Tools. After that you have to reboot. From now on the resolution will automatic fitt to the screen size and a share drive shows up on your Mac desktop. If you now setting up a share in your VMware Workstation you can reach it from within the VM via that share drive - cool, isn´t it :-)
- Now shutdown the VM, make a snapshot, add a soundcard (in the settings) and power it on again, we will now update the VM to 10.7.2!
5## Update to Mac OS X Lion 10.7.2
- After booting you have to open a terminal window in the Mac VM.
- We now backup a file - the dot at the end isn´t accidentally!
cp -r /System/Library/Extensions/AppleLSIFusionMPT.kext .
- Copy the Mac Os X update to 10.7.2 to your share drive and install it within the VM. Don´t reboot!
- Now we remove the AppleLSIFusionMPT.kext that was created by the installation and replace it with our backup file:
sudo rm -rf /System/Library/Extensions/AppleLSIFusionMPT.kext
sudo cp -r AppleLSIFusionMPT.kext /System/Library/Extensions
- Now reboot the VM, copy the EnsoniqAudioPCI_v1.0.3_Lion.pkg to the share and install it within the VM. After a reboot you should have working sound :-)
- If your screen resolution won´t change dynamically any more it´s because of the system update, you can fix it by installing the VMware tools again ;-)
6. Clean up
- Shutdown your VM. Remove the second hard drive and the mounted CD-iso, you do not need them any more.
- Take a final snapshot!
- Now you hopefully have a working Mac OS X Lion 10.7.2 VM in the Mac OS X Lion directory, feel free to move your VM to another location of your hard drive and remove/backup the installation files.
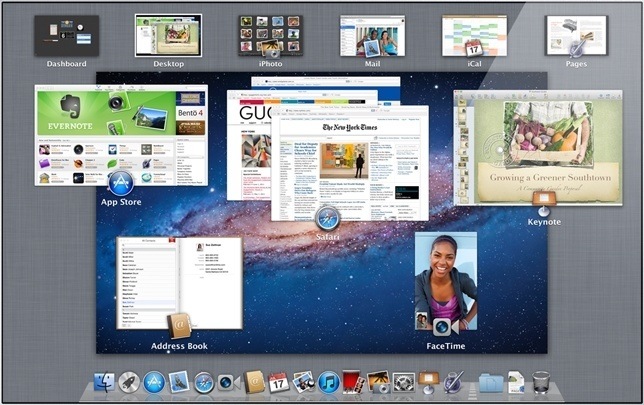
7. Enjoy
8. Edit: Update to OS X Lion 10.7.3
- To update your system to 10.7.3 you have to download the update-image from apple.com and then go back to step 5.
- After installing 10.7.3 the sound and VMware driver should still work, so you can pass this two steps ;-)