I’m using the UniFi UXG-Lite as a router in my home network. It connects to my DrayTek Vigor 167 modem (previously Vigor 130). In this post I publish the settings to configure the two devices and describe how you can reach the modem once the setup is running.
Modem configuration
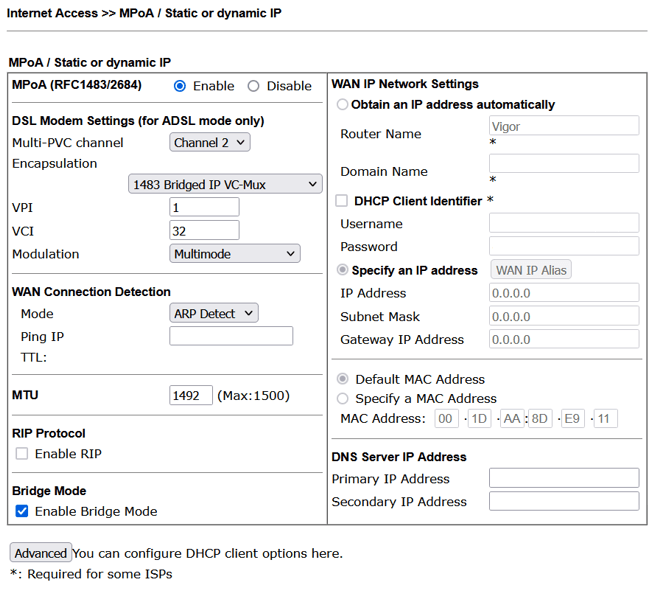
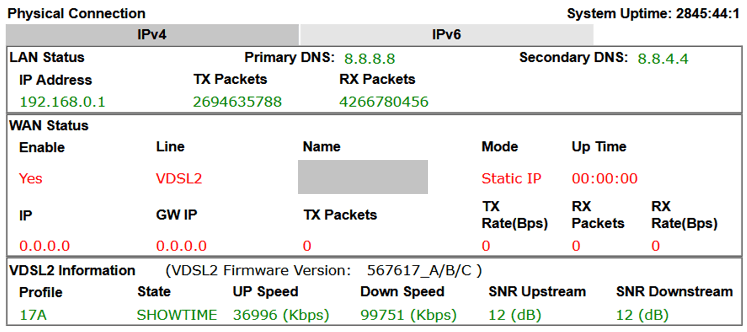
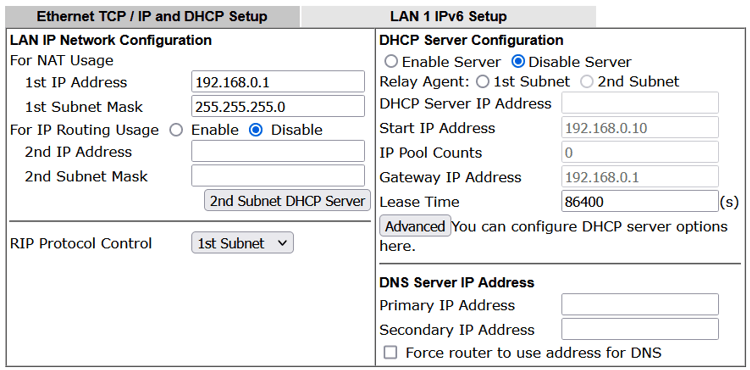
My configuration is Telekom specific. Especially the VDSL2 Tag 7 can be different depending on the provider. I configured it on the modem, but it can also be configured on the router. It does not make a difference. The Modem has a static IPv4 assigned: 192.168.0.1

Router Configuration
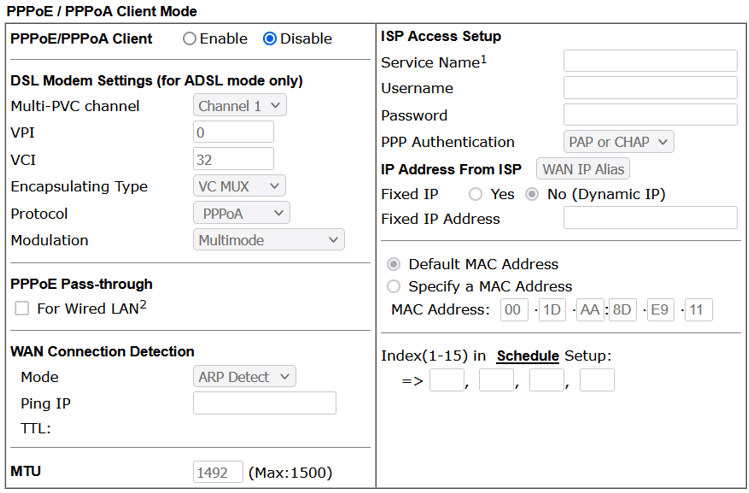
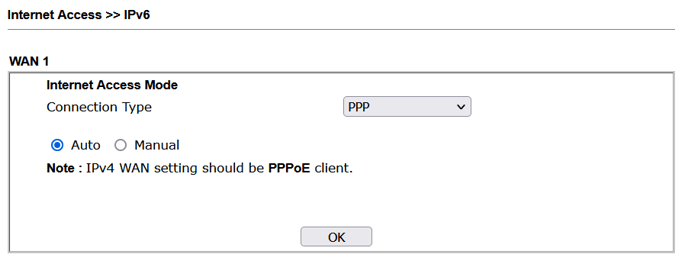
The internet configuration on the router is a no brainer. Open the Internet settings and if you haven’t configured the VLAN ID on the modem you have to select it in the router. In the IPv4 configuration section you have to select PPPoE and input username and password that was provided by your ISP (Telekom).
Telekom username
The construction of the username is very cumbersome. Below is the format you have to generate:
Anschlusskennung: 111111111111
Teilnehmernummer: 222222222222 (12 digits) or 33333333333 (11 digits)
Mitbenutzerkennung: 0001

Teilnehmernummer with 12 digits example: [email protected]
Teilnehmernummer with 11 digits example: 11111111111133333333333#[email protected]
                                         11111111111133333333333\#[email protected]
Connecting to the Modem
Once everything is configured and in place the modem is not reachable anymore. On a UXG Gateway you can create the following configuration to make it work:
{
    "interfaces": {
        "pseudo-ethernet": {
            "peth0": {
                "address": ["192.168.0.2/24"],
                "description": "Access to Modem",
                "link": ["eth1"]
            }
        }
    },
    "service": {
        "nat": {
            "rule": {
                "5000": {
                    "description": "MASQ Modem access",
                    "destination": {
                        "address": ["192.168.0.1"]
                    },
                    "outbound-interface": ["peth0"],
                    "type": "masquerade"
                }
            }
        }
    }
}
However, the UXG-Lite does not have the option to configure it permanently. What you can do instead is to login to the UXG-Lite via SSH and add the routing for eth1 manually:
# Assign a Static IP to eth1
sudo ip addr add 192.168.0.2/24 dev eth1

# Bring the Interface Up
sudo ip link set eth1 up

# Add a static route
sudo ip route add 192.168.0.0/24 dev eth1
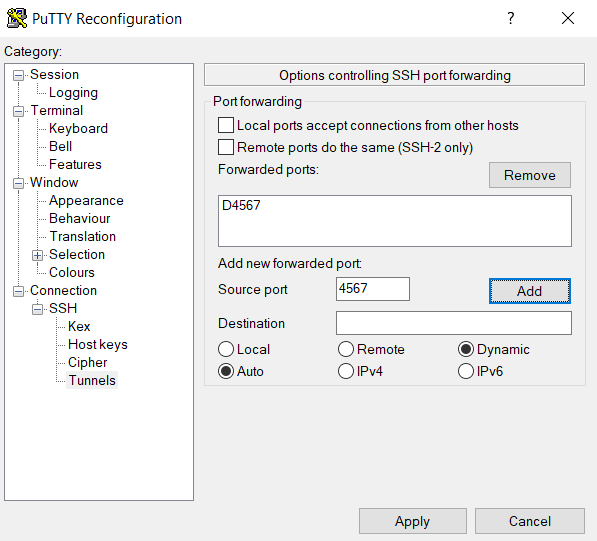
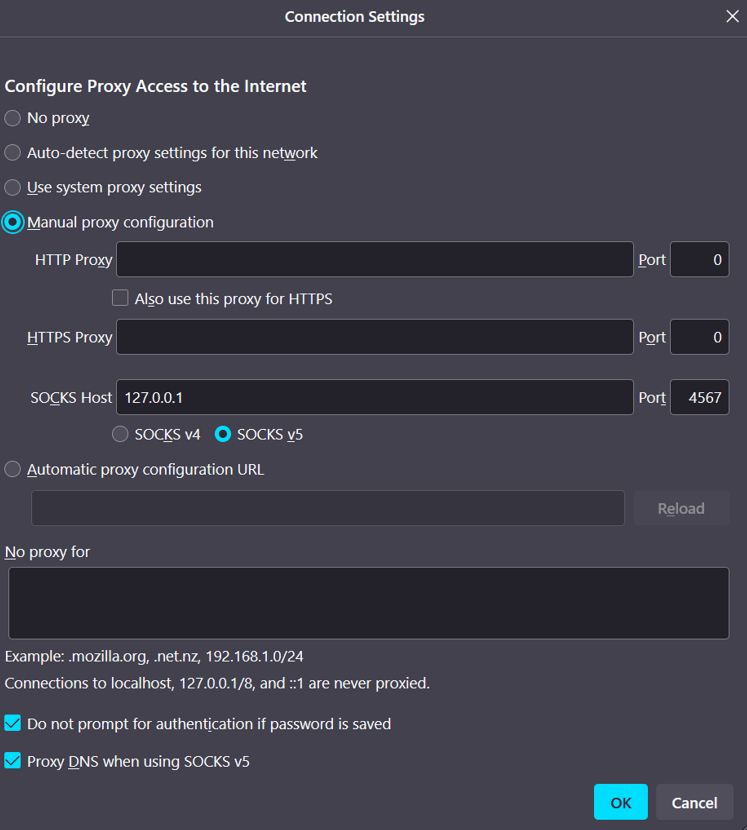
After that you can create a SSH tunnel to your UXG-Lite and setup a SOCKS5 proxy in your browser in order to reach the Modem.
Revert the changes to the routes
This is not strictly necessary. After a reboot of the device the settings are lost. I also noticed that any modification to the WAN settings on the UXG-Lite will remove the route. However, if you like to manually remove it after you are done you can execute the following command:
sudo ip route del 192.168.0.0/24