This project creates a system that can run an ARM Linux server 24/7 without any external power. The system will run on batteries that are charged by a solar panel. A remote monitoring solution will track the system and collect sensor data.
Case Assembly
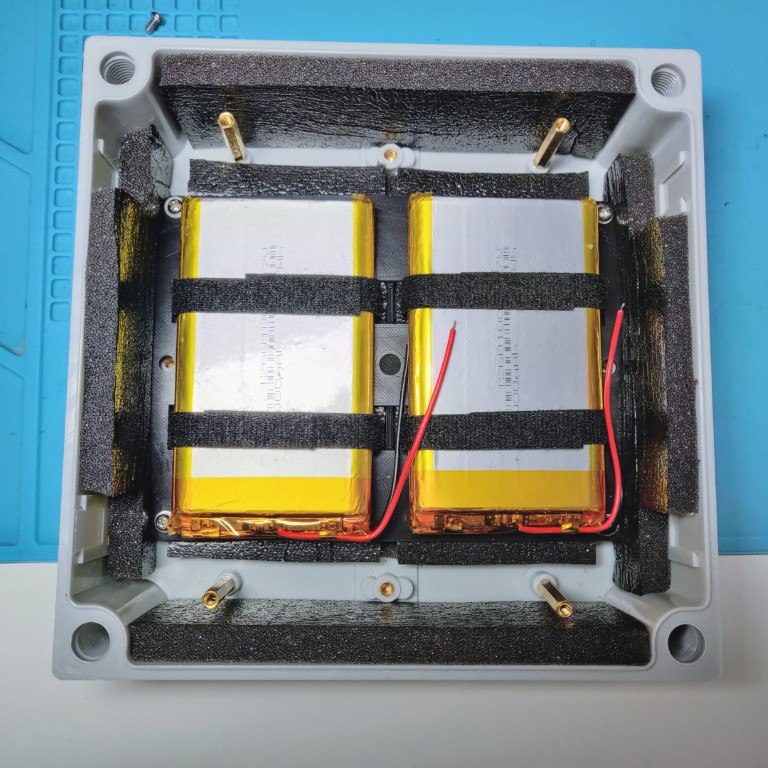
After collecting all materials and printing the 3D models the case gets assembled. But before the case assembly can start, insert nuts (M3) need to be pressed into the case to be able to fixate the 3D model layers. The batteries can be fixated by Velcro tape, zip ties or a combination of both. The battery level can then be screwed directly onto the screw holes. After that, hex spacer screws will be used to get the necessary space between the battery packs and the electronics.
Electronics
Screw the Raspberry Pi into place as a reference point for the ribbon cable. Then add the pin plug and the two sockets to the cable. Try to attach the cable sockets in line with the cable because offsetting will bend the cable when connecting the hats.
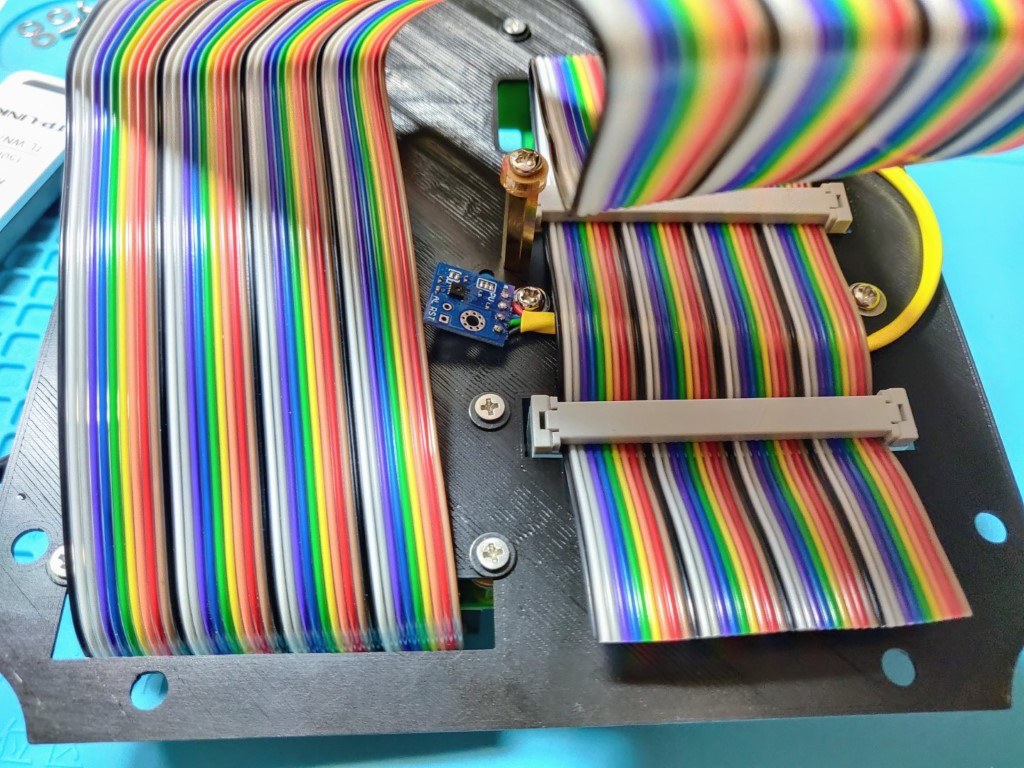
Next attach the hats, fit the cables, glue the button to the board, connect the temp/humidity sensor to the bottom of the board and take care of the cable management. Adding the temp/humidity sensor to the bottom will give better readings since it should measure the battery conditions. Adding the sensor on top of the electronics will probably alter the readings since the Pi will dispense some heat.
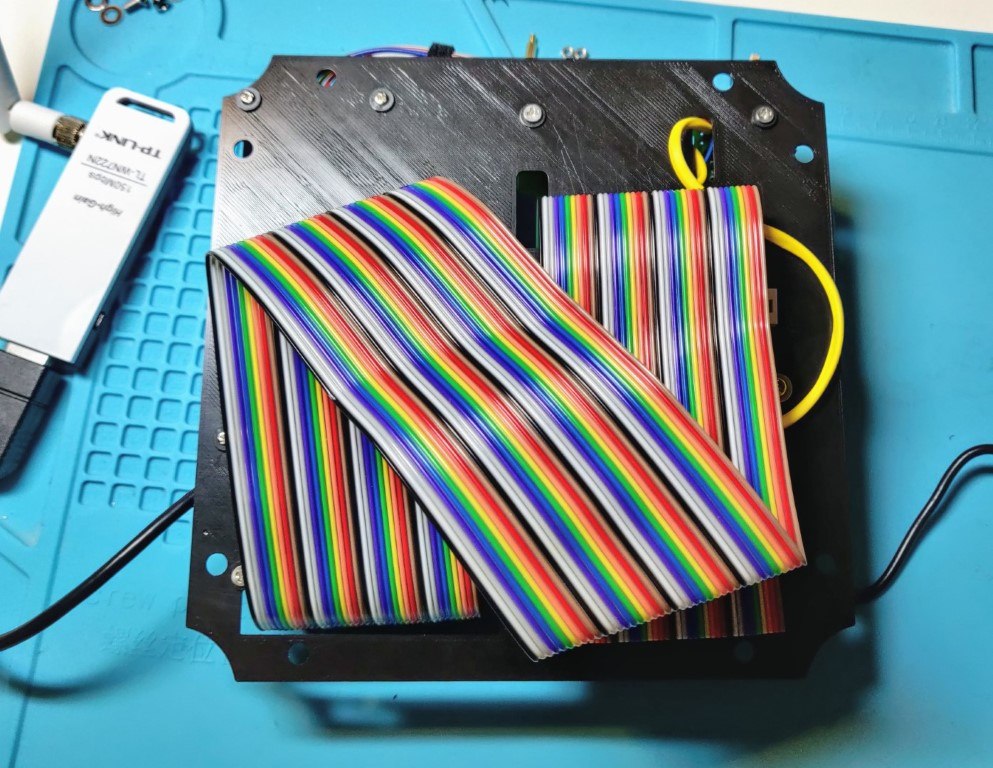
Dry fit the two layers in the enclosure. If all fits well, add the insulation. The external WIFI dongle will later be mounted (glued?) to the box and a whole for the external antenna and the solar panel will be drilled.
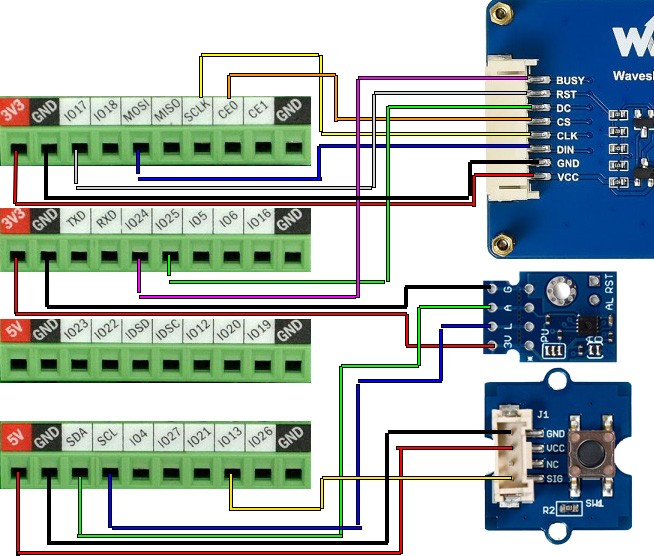
Terminal Pin Connections
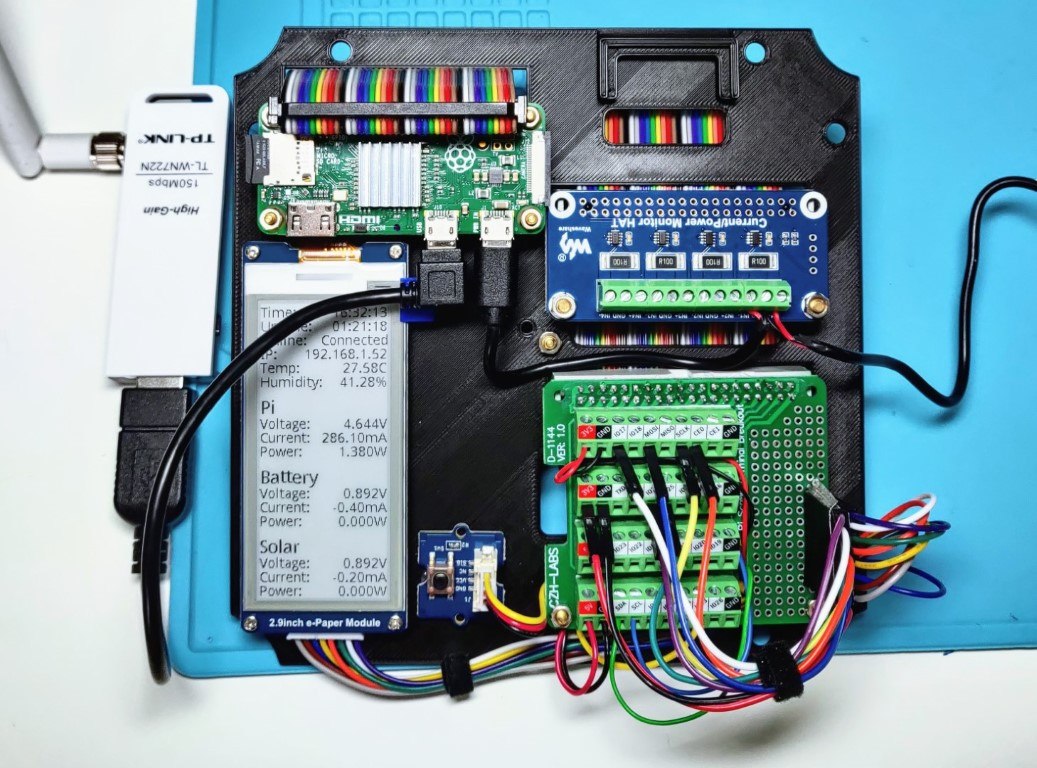
Connect the cables to the terminal as displayed in the following picture.
System Preparation
The following configurations and libraries need to be present for the scripts to work.
Python Libraries
sudo apt-get install python3-pip
sudo apt-get install python3-pil
sudo apt-get install python3-numpy
sudo pip3 install RPi.GPIO
sudo pip3 install spidev
ePaper Libraries
Install BCM2835
wget http://www.airspayce.com/mikem/bcm2835/bcm2835-1.60.tar.gz
tar zxvf bcm2835-1.60.tar.gz
cd bcm2835-1.60/
sudo ./configure
sudo make
sudo make check
sudo make install
#For more details, please refer to http://www.airspayce.com/mikem/bcm2835/
Install wiringPi
sudo apt-get install wiringpi

#For Pi 4, you need to update it:
cd /tmp
wget https://project-downloads.drogon.net/wiringpi-latest.deb
sudo dpkg -i wiringpi-latest.deb
gpio -v
#You will get 2.52 information if you install it correctly
Optional: Download example code to get the Waveshare epd library:
sudo git clone https://github.com/waveshare/e-Paper
cd e-Paper/RaspberryPi\&JetsonNano
Scripts
The scripts are published in a GitHub repository called jwillmer/IndependentIoT. Clone the repository and follow the readme to get started. This is my first-time using Python, if you can improve the code feel free to make a pull request!
The repository contains two scripts. One will be executed every 15 minutes by the system. It will collect sensor data and posts the data to the remote endpoint or a CSV file. The second script is monitoring the button press event. As soon as someone presses the button the script will collect all sensor data and present it on the ePaper screen. This way the ePaper screen only changes when were is a need for it.
Next
In the next part of the series we will install the solar panel, the WIFI antenna and connect the PSU.